If you’re leading the development of a new electronic medical device, you know that medical device verification and validation (V&V) aren’t just line items in a project plan. They are the bedrock of patient safety, the core of your regulatory submission, and the firewall between a successful launch and a catastrophic recall. Mismanaging V&V introduces unacceptable risk to patients and all but guarantees budget-killing delays, painful conversations with auditors, and downstream manufacturing failures.
This guide is for the engineering and program leaders—the VP of Engineering, Program Manager, or Lead Engineer—tasked with steering a complex device from concept to production. It applies when you're moving from initial prototypes toward formal design freezes and regulatory submission. Our goal is to provide a practical, decision-oriented framework for building a V&V program that is both efficient and defensible under scrutiny, grounded in the realities of tight timelines and finite resources.
Here's how we'll get there:
- The Core Distinction: A clear, operational difference between Verification ("Did we build the device right?") and Validation ("Did we build the right device?").
- A Risk-Based Framework: How to use risk analysis (FMEA) to drive your V&V strategy and focus effort where it matters most.
- Actionable Next Steps: Practical advice on avoiding common pitfalls and creating the artifacts needed for a successful regulatory submission.
Distinguishing Verification From Validation
In the regulated world of medical devices, confusing verification and validation is a serious error. They are distinct disciplines that answer two different, equally critical questions. Understanding this difference is fundamental to building a defensible Design History File (DHF) and, more importantly, a safe and effective product. Verification is an inward-looking engineering activity focused on specifications. Validation is an outward-facing activity focused on the user and their clinical needs.
Verification: Did We Build the Device Right?
Verification is the process of confirming through objective evidence that your design outputs meet your design inputs. In plain English, it’s rigorous testing to prove you built the device precisely as specified in your engineering requirements.
Think of it as a checklist of objective, pass/fail questions answered with hard data:
- Does the firmware boot within the specified 3-second window? (Testable against a requirement).
- Does the battery deliver the required voltage under maximum load? (Measurable against a spec).
- Does the device survive a 1-meter drop onto concrete without damage to its enclosure? (Pass/fail against a physical requirement).
Every verification test must trace directly back to a specific, measurable design requirement. The goal is to prove, with evidence, that you followed your own blueprint to the letter.
Validation: Did We Build the Right Device?
Validation asks a more fundamental question: does the device you built actually meet the user’s needs and its intended use in the real world? This process confirms that you understood the problem correctly from the very beginning.
You can have a perfectly verified device—one that meets every technical specification—that is clinically useless or even dangerous in the hands of the actual user. This is a validation failure.
Let's consider a new handheld blood glucose meter:
- Verification would confirm the device measures glucose with an accuracy of ±5%, the results display on the screen, and the battery lasts for over 500 tests. These are all testable against your engineering specifications.
- Validation, however, involves putting the device into the hands of real diabetic patients and nurses in a simulated-use environment. It answers questions like: Can an elderly patient with hand tremors easily insert the test strips? Is the screen bright enough to be read in a dimly lit hospital room? Are the instructions for use (IFU) so clear that they prevent critical user errors?
Validation forces you out of the lab and into the messy reality of clinical use. It proves your device isn't just technically sound, but also safe and effective for its intended purpose.
Verification vs. Validation At a Glance
| Aspect | Verification ('Did we build it right?') | Validation ('Did we build the right thing?') |
|---|---|---|
| Core Question | Does the device meet its specifications? | Does the device meet user needs and its intended use? |
| Key Input | Design Inputs (Requirements, Specifications) | User Needs, Intended Use Scenarios |
| Typical Activities | Unit tests, integration tests, system tests, inspections, analysis, static code analysis. | Usability studies, human factors engineering, clinical trials, simulated-use testing. |
| Outcome | Objective evidence that design outputs meet design inputs. | Objective evidence that the device is safe and effective for its intended clinical application. |
Ultimately, both are non-negotiable. You need both to create a defensible DHF and a product that works for the people who depend on it.
How to Build Your V&V Master Plan
A successful V&V program doesn’t happen by accident; it’s built on a detailed V&V Master Plan established early in the development lifecycle. This document is your project's constitution for quality—the single source of truth that defines the what, why, when, and how of proving your device is safe and effective. Without this roadmap, teams inevitably lose their way, tests become untethered from requirements, and you're left scrambling before an audit.
This diagram helps visualize how verification and validation are two distinct, yet parallel, tracks aimed at answering two very different questions.
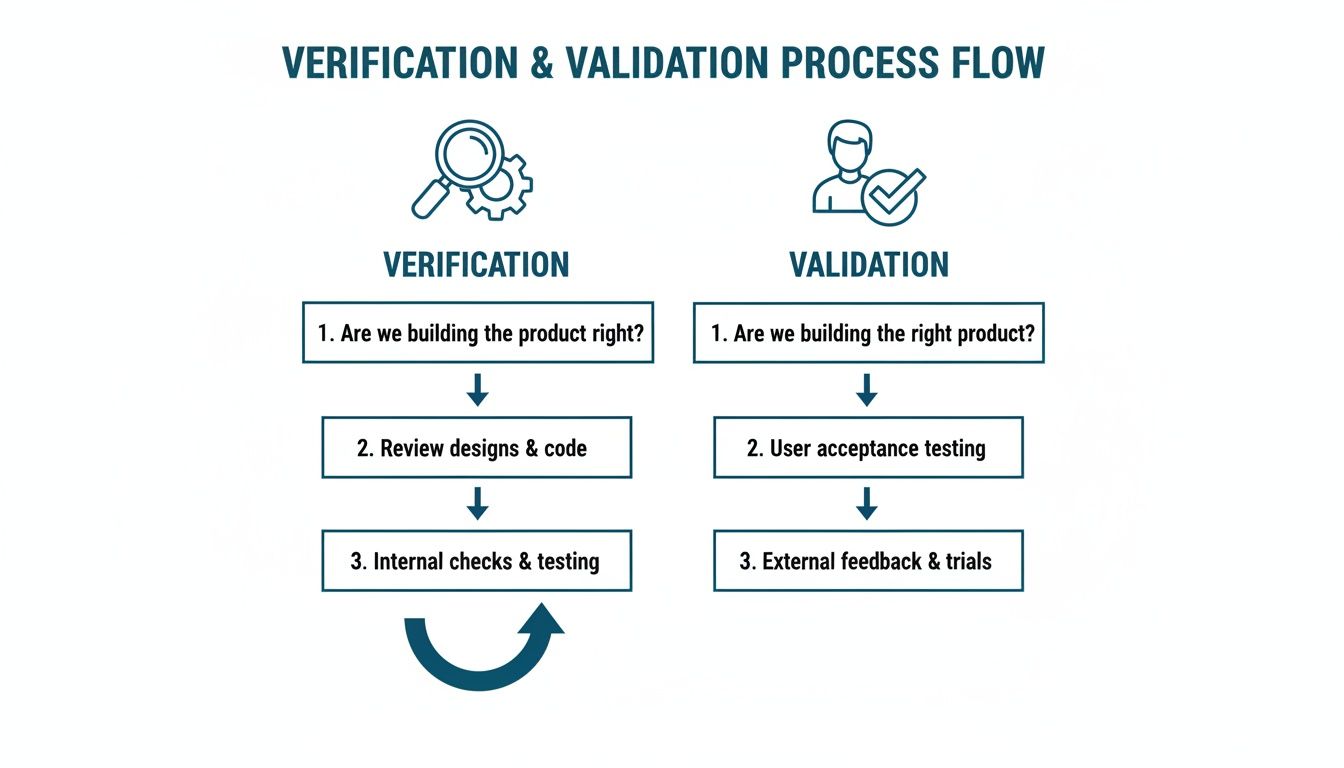
Verification is all about specifications and technical outputs, while validation circles back to the user and the real-world problem you're trying to solve. Both are absolutely critical.
Core Components of a V&V Master Plan
Your V&V Master Plan is the strategic glue holding your quality effort together. It must be clear, comprehensive, and executable.
At a minimum, it must cover:
- Scope Definition: Be precise. What product, features, and configurations fall under this plan?
- V&V Strategy: Describe the high-level approach for hardware, firmware, and software, including the methods you will use.
- Resource and Responsibility Matrix: Name names. Who writes protocols? Who executes tests? Who signs off on reports?
- Test Environment and Equipment: List all required test fixtures, specialized lab gear, simulation software, and other tools.
- Acceptance Criteria: Define success before you start. How will you objectively determine if a test passes or fails?
Linking V&V to Development Phases
The real power of the Master Plan is in how it maps V&V work directly to your development milestones, forcing testing to happen alongside design, not as a panicked activity at the end.
From our perspective at Sheridan Technologies, thinking about Design for Testability (DFT) from day one is the most effective way to prevent costly downstream failures. Your V&V Master Plan codifies this proactive mindset.
Here’s a typical alignment of activities:
- Engineering Verification Testing (EVT): Early-stage risk reduction. You’re running unit and integration tests on rough prototypes to see if the core engineering is sound.
- Design Verification Testing (DVT): A comprehensive verification blitz on production-equivalent units. Every design specification is rigorously tested to prove you “built it right.”
- Production Validation Testing (PVT): The final hurdle. You prove your manufacturing line can consistently produce devices that meet spec. This often includes final human factors and usability validation to confirm you “built the right device.”
When the V&V master plan involves software, it's essential to integrate modern security practices. A holistic approach like web application security testing is critical for uncovering vulnerabilities before they become a post-market crisis.
Establishing Unbreakable Traceability
The bedrock of any V&V plan is traceability. You must be able to draw a direct line from every user need to a design requirement, and from that requirement to a specific verification or validation test. This creates the unbroken chain of objective evidence that an auditor will demand to see. Your plan must specify the tool or system for managing this traceability matrix, ensuring it’s a living artifact. To ensure your team is prepared for this level of rigor, consider exploring full-service medical device development services that integrate V&V planning from the start.
Integrating Risk Management Into Your V&V Strategy
In medical device development, risk management is not a parallel activity; it's the engine that drives your entire medical device verification and validation strategy. A V&V plan not built on rigorous risk analysis is indefensible. Standards like ISO 14971 mandate a systematic approach to identifying, evaluating, and controlling risk throughout the device lifecycle.
A risk-based V&V strategy focuses your finite time and resources where they matter most—on the areas with the greatest potential for patient harm. This ensures you’re not just testing against a feature list, but actively proving you have controlled for foreseeable hazards.
From FMEA to Test Case
The primary tool for this is the Failure Mode and Effects Analysis (FMEA). In an FMEA, your cross-functional team brainstorms what could go wrong, the severity of the consequences, and the likelihood of each failure. Any failure mode with an unacceptable risk score demands mitigation, and your verification plan becomes the definitive proof that those mitigations work.
This creates a powerful, logical narrative for auditors:
- Identify a Risk: Your FMEA flags that a power supply failure in a portable defibrillator could prevent it from delivering a life-saving shock (a critical risk).
- Define a Mitigation: The design team implements a redundant battery circuit and adds a firmware-based "low battery" alarm that triggers at 20% capacity.
- Create a Verification Test: Your verification protocol must include a test where the primary battery is intentionally failed, proving the redundant circuit takes over seamlessly. A separate test confirms the alarm sounds exactly when the battery hits the 20% threshold.
This direct, traceable line from risk to mitigation to verification test is the essence of a defensible V&V strategy.
Prioritizing Based on Risk
Not all requirements are created equal. A cosmetic blemish on a device's enclosure is a low-risk problem. A software bug in an infusion pump's dosage calculation algorithm is a catastrophic, high-risk failure mode.
Your risk analysis, guided by ISO 14971, provides the objective framework for prioritizing your test efforts. It tells you where to spend your energy, your budget, and your team's focus, ensuring you apply the highest level of scrutiny to the functions that can cause the most harm.
By classifying requirements and their associated failure modes by risk level (high, medium, low), you can justify the depth and rigor of your testing. High-risk functions demand exhaustive testing across all operating conditions. Low-risk features might be adequately covered by more limited, targeted testing. This prioritization doesn't just improve efficiency; it demonstrates mature engineering judgment to regulatory bodies.
As you build this risk framework, consider the evolving regulatory landscape, especially for devices with advanced technologies. For insights on managing compliance for AI-driven products, see this guide on Navigating the Risks and Regulations of AI in Healthcare. At Sheridan Technologies, we see this risk-based approach as a fundamental principle: you build the risk reduction strategy directly into your V&V workflow from day one.
Key V&V Artifacts for Your Design History File
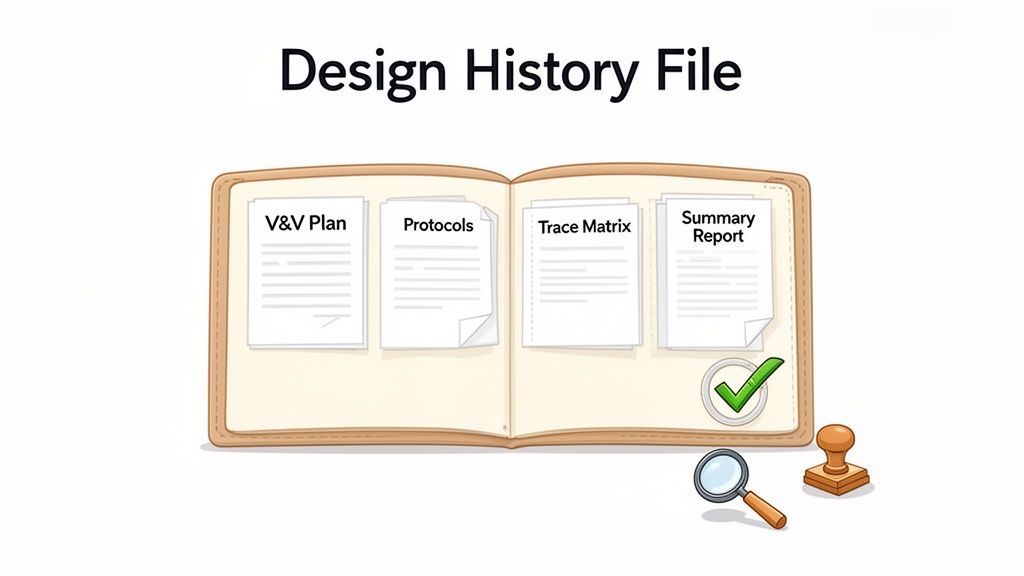
Your Design History File (DHF) is the complete, auditable record of your device’s development. It must contain every piece of evidence needed to prove you designed a safe and effective device under a state of control. The artifacts from medical device verification and validation are the most critical evidence in that file.
An auditor expects to see an unbroken chain of logic demonstrating a disciplined, planned, and meticulously documented process. This isn’t bureaucracy; it’s creating an unimpeachable record that proves your device is safe and works as intended.
The Foundational Document: The V&V Master Plan
The V&V Master Plan (VMP) is the strategic blueprint for your entire testing program. It’s the first document an auditor will ask for because it frames every subsequent activity. The VMP defines the scope, strategy, schedule, and resources, demonstrating you had a cohesive plan from the start.
The Core Testing Documents
With the plan established, the execution phase is captured in granular documents that record what you tested, how you tested it, and what you found.
- Verification and Validation Protocols: A precise "recipe" for a specific test, detailing its purpose, procedure, equipment, and—most importantly—pre-defined, objective pass/fail acceptance criteria. There can be no ambiguity.
- Executed Test Records: Your completed protocols, filled out during testing, containing all raw data, observations, and final results. This is where objective evidence (instrument readouts, logs, screenshots) is non-negotiable.
- Deviation Reports: If a test fails or you deviate from a protocol, you must document it formally. This report captures the what, why, and how of the deviation, including an impact analysis and remediation plan.
At Sheridan, we treat documentation as an engineering discipline, not an administrative task. Well-structured artifacts force clarity of thought and create an unambiguous record of decisions, reducing project risk.
The Connective Tissue: Traceability and Summaries
Two final artifacts tie all the evidence into a coherent narrative.
First, the Requirements Traceability Matrix (RTM) is arguably the most important document in your DHF. This matrix creates unbreakable links from every User Need to its corresponding Design Input, then to the Design Output, and finally to the specific Verification or Validation test that proves it was met. Our guide on designing medical devices provides crucial context on building this traceability from the start.
Second, the V&V Summary Report serves as the capstone. It summarizes the outcomes of all V&V activities, providing a high-level conclusion on whether the device has been successfully verified and validated. This report references the underlying evidence and formally declares that the device is ready for the next stage.
Common V&V Pitfalls and How to Avoid Them
Even seasoned teams can stumble into common medical device verification and validation traps. These missteps almost always lead to project delays, budget overruns, and stressful regulatory conversations. They’re rarely due to a lack of technical skill but rather process gaps and a failure to see V&V as a continuous discipline woven into the entire development lifecycle. When V&V is treated as a final checkpoint, teams often uncover fundamental design flaws with no time left, forcing expensive rework that could have been avoided.
Pitfall 1: Untestable Designs
A design you can't properly test is a design you can't verify. This happens when Design for Testability (DFT) isn't a core principle from the first architecture meeting. Engineers, focused on core functionality, can create systems where critical signals are inaccessible, internal states are invisible, and failure modes are impossible to replicate on a test bench. Imagine a critical power management IC buried inside a potted module with no external test points. Verifying its behavior becomes nearly impossible without destructive testing.
Early Warning Signs:
- Test engineers complain they can't access critical nodes or see internal firmware states.
- Test protocols rely on indirect, observational outcomes instead of direct measurements.
- Firmware has no logging capabilities or a "test mode" to force specific conditions.
How to Get Ahead of It:
- Embed your V&V lead in early design reviews. They must have a seat at the table to advocate for test points, debug interfaces (JTAG/SWD), and firmware hooks.
- Mandate a DFT checklist as a required deliverable for every hardware and firmware design review.
- Build in test automation hooks from day one, such as command-line interfaces that let scripts control and query the device.
Pitfall 2: Disconnected Traceability
A broken traceability chain is an immediate red flag for any auditor. This happens when the links between user needs, design requirements, risk controls, and V&V test cases are missing or incomplete. Without this "golden thread," you cannot prove you’ve tested your device against every requirement and controlled every risk. It’s an indefensible position. This problem often occurs when teams use a static spreadsheet that inevitably falls out of date as the design churns.
A traceability matrix is not a "check-the-box" document. It is a living project management tool used to actively manage scope and risk from day one. An incomplete matrix indicates an out-of-control process.
Pitfall 3: Conflating Verification with Validation
This fundamental error happens with surprising frequency. Teams can execute a flawless verification plan, proving the device meets every technical specification, and still completely fail validation by forgetting its core purpose: confirming the device meets user needs in its intended use environment.
A Classic Real-World Scenario: The Under-Pressure Startup
A medtech startup developing a wearable biosensor is behind schedule and burning cash. The engineering team verifies that sensor accuracy is within ±2%, battery life is 72 hours, and BLE data packets are perfect, passing 100% of their verification tests.
But they rushed the human factors work. In a pilot study, nurses find the sensor clumsy to attach in a busy ward. The single-button UI is confusing, causing them to misinterpret the device’s status. The device was perfectly verified but failed validation because it wasn't suitable for its real-world context.
How to Avoid This Trap:
- Separate the plans and the teams. Have distinct Verification and Validation plans, ideally with different owners. Verification is an engineering function; validation is typically owned by quality, clinical, or product teams.
- Start user research early and often. Use mockups and simulated use studies to get feedback long before the design is frozen.
- Focus validation on user needs, not specs. Validation protocols should be built around user scenarios ("Can a nurse successfully apply the sensor in under 60 seconds?"), not technical requirements.
Monday-Morning Usefulness: Your V&V Checklist
To translate these principles into action, here are the practical next steps for engineering and program leaders. Use this as a checklist to assess the health of your V&V program today.
What to Check
- V&V Plan: Does a formal V&V Master Plan exist? Was it created early in the project or as an afterthought?
- Traceability: Can you pull up your Requirements Traceability Matrix (RTM) right now? Is it complete and up-to-date, linking every user need to a test?
- Risk Integration: Does your V&V plan explicitly reference your FMEA or risk analysis file? Can you show how high-risk failure modes are covered by specific verification tests?
- Testability: Sit down with your test lead. Ask them to identify the top three things that make the device difficult to test. Their answers will reveal your DFT gaps.
What to Decide
- Resource Gaps: Is the team responsible for V&V properly staffed? Do they have the right tools (test fixtures, automation frameworks, etc.) to succeed?
- Plan Ownership: Who owns the V&V Plan? Who owns the Validation Plan? Are these roles clearly defined and empowered?
- Test Automation Strategy: What is your strategy for test automation? Have you decided which tests will be automated to improve coverage and which must remain manual (e.g., human factors)?
What to Create
- V&V Master Plan: If you don’t have one, start drafting it now. It’s never too late to impose order.
- DFT Checklist: Institute a mandatory Design for Testability checklist for all hardware and firmware reviews going forward.
- Summary Reports: Ensure a V&V Summary Report is planned as a key deliverable to capstone the effort before regulatory submission.
What to Watch
- Test Failures: A pattern of failures in one area points to a fundamental design weakness. Don't just patch the bugs; address the root cause.
- Protocol Deviations: A high number of deviations means either your protocols are poorly written or your design isn't stable. Investigate which it is.
- Team Friction: If your design and test teams are constantly at odds, it’s a sign that testability was not prioritized early enough. Intervene to get them aligned.
At Sheridan Technologies, we believe that a robust V&V strategy is the cornerstone of successful product development and late-stage risk reduction. If your team is facing challenges with verification, validation, or manufacturing readiness, our experts can provide the disciplined engineering support needed to de-risk your program. To discuss your project, request a verification plan review with our team.